Click on the Add button to add images

In this example we will upload 3 photos:
Lips 100x80 - This will be the image I'll add to my page. We advise our users to reduce the size of their images to the size they need them to be on their websites, otherwise it will take them a long time to load.
Lips 100x80 Black&White - This is the same image as before with the same size, but in black and white. I will use this image to make the rollover.
Lips 500x400 - This is the same image as the first one in color, but with an increased size. I will use this image to make the lightbox.

The uploaded images will show in your Images tab.


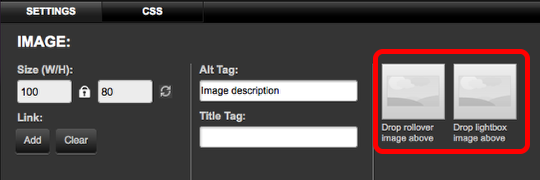
In the options panel you can see these two boxes where we are going to drag our images.
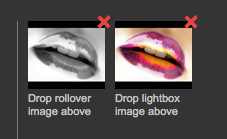
Drag the small black and white image to the first box. After doing this, when you are in Preview or Live mode and you move your mouse over the original image, you will see the black and white photo.
Drag the larger image to the second box to create a lightbox. When you go to Preview or Live mode and click on the image a pop up will show you the larger image.
This is an example of a Lightbox image. You will need to be in the Preview mode to test these options.

© Copyright TLD Registrar Solutions 2025. All Rights Reserved. www.tldregistrarsolutions.com.
