Q: I have imported some large PNG images and now my site seems very slow. Why is this?
A: PNG files are not an appropriate format for large images. PNG files are best used for small graphics where you need transparency. You should try to use JPEGs where possible. For an 800 x 600 image the difference between a JPEG may be 90% smaller than a PNG without appreciable loss of visual quality.
Q: Why does my PNG file not work properly?
A: Check that your PNG is a RGB format image.We support 24bit and 32 bit PNG files. We do not support 8 bit PNG files. For best results we recommend you use Photoshop's 'Save for web and devices' option to create the files.
Q: What size should my images be?
A: For best performance always use 72 dpi images and scale them to the correct size in Photoshop or some other image editor before you import them. If you import a large image and then scale it down the image still retains it's full file size and this may make your web page slow to load.
Q: Can I use GIFs?
A: Website Builder does support GIFs but we recommend you do not use this format. Unless you need animation, use JPEG instead. If you do need to use GIFs, avoid scaling them.
Q: Is there a limit to how many images I can upload?
A: No, there is no limit. You can upload as many images as will fit within your storage allowance. Demo accounts have 10Mb of storage space, paid-for accounts have 1Gb or more.
Q: How many images can I upload simultaneously?
A: You can upload up to 5 images in a single go.
Q: Can I place one image on top of another?
A: You may be able to use the Background Widget to do this.
You can import JPEG or PNG format images. Generally it's best to use JPEG for photographs and PNG for graphics.
Note 1: If the Add Image button is not visible, this may indicate you need to re-install Adobe Flash player. Logout of the editor, go to http://get.adobe.com/flashplayer/ and follow the installation instructions.
Note 2: IE6 does not support PNG transparency. If you want IE6 compatibility do not use PNG transparency.
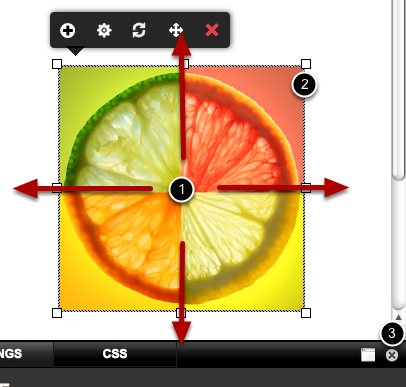
Do not click on the borders or the handles (2) to move the image.
The image will not move if the settings panel is open. Use the close button (3) to close the panel
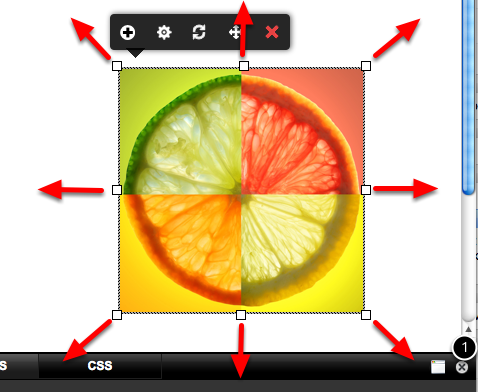
The image will not scale if the settings panel is open. Use the close button (1) to close the panel.
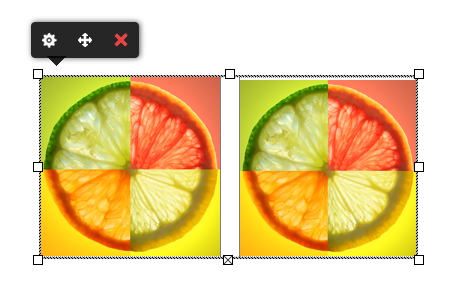
Use the columns layout widget to place images or any other widget alongside each other, or you could just drag one image by the side of other and the column will appear.
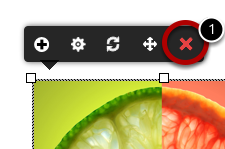
To delete an image from the page, click the delete button (1). To remove the image from your site you must also delete it from the Images Tab.
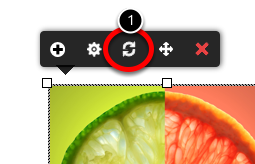
Click the reset button (1) to reset the image to it's original size
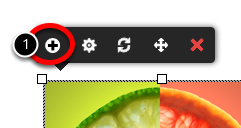
With this button (1) you'll be able to see all the images you have in your library and change the current image for another.
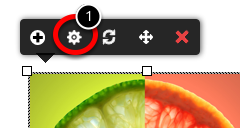
First click on the image configuration button (1) so the settings panel will be displayed.
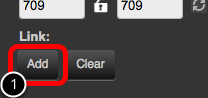
Click the Add link button (1).
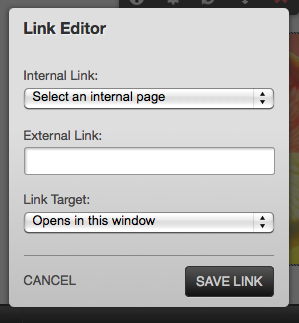
A window will display. Paste in the URL you want the image to link to or select one from the drop down menu.
© Copyright TLD Registrar Solutions 2026. All Rights Reserved. www.tldregistrarsolutions.com.
